Click Here For Free Blog Backgrounds!!!
Blogaholic Designs

Saturday, October 20, 2012

It's the Great Pumpkin Charlie Brown!

Recently while looking through my drawer of stickers I found this package of Jolee's "Peanuts gang" dimensional stickers that I had purchased a long time ago..... and I knew immediately that I wanted to create a Halloween layout with them! I'm sure we have all seen the old Charlie Brown cartoon that they still air every year during October.........I have been watching this show since I was a kid, and now I watch it with my grandchildren! (now I'm showing my age)


Anyway, to get started I wanted a little inspiration so I looked online and Googled "It's the Great Pumpkin Charlie Brown" and I found this picture from the book:


So I started with a plain light blue 12x12 piece of cardstock and I inked the background with TH distress inks in "dusty concord" & "broken China" using a swirling motion with my blender tool! (turned out pretty good....huh?) Next I cut a circle for the moon and chalked it with blue and yellow chalk. I Hand cut the sign and wrote "Welcome Great Pumpkin" with a permanent marker and then inked the edges. The pumpkins were from an old svg file called the"Fall collection" that I have had forever but I am not sure if the file is from Treasure Box Designs or Little Scraps of Heaven as I buy a ton of svg files from both sites and I believe the set I took the pumpkins from is now retired, as I have searched both sites and can not locate this file! 
(If anyone knows which site this file is from Please let me know so I can give proper credit! Thanks!!) Anyway, moving on........I cut the pumpkin pieces, inked and chalked them to give them dimension and then assembled them. The tree is just a random svg file I found online for a spooky tree that I applied black stickles to after cutting it out. And the grass across the bottom of the page I hand cut with a pair of straight scissors. Last but not least when I started assembling the page I ended up only using three of the "Peanut's Gang" characters and I cut Charlie Brown's left arm off to make him work with my scene! 
(Sorry Charlie! ha ha) 


Thanks for looking!

Tuesday, August 14, 2012

Monster High Layout

Today I wanted to share a layout I worked on for my grandaughter. But first let me tell you the story behind it: She found this cute little hat at Walmart and "had to have it" because she said the skull emblem on the hat was from one of her fav shows called Monster High! And then we had to go to Kohl's and buy her this cute little shirt and a black skirt to match her little hat! (She is such a little Diva at 5 years old! ha ha) And then last but not least I popped into Michael's craft store the other day with her to pick up a few things and she found this glitter paper, Pink Card stock, Iron on skull, diamond bling, and also the pink ribbon....... and she put them in the cart and "informed" me that the supplies she had picked out were for the Layout I was gonna make for her scrapbook! I have to admit it kind of tickled me that she did such a good job picking out her paper and embellishments as you can see! So I sat down today while she was in school and made her layout.  


The only thing extra I added to this layout that she did not pick out was the tags and the bottle caps. I found these images below online and I printed them out. I cut out the skull with a one inch punch and added it to the bottle caps and then put the clear epoxy stickers over the image. As for the MH shield....I printed it at 3x3 inches and then fussy cut it out to place on one of the tags I have on the layout with info on her fav show Monster High. The other tag I will use for my journaling. I also cut the title "Drop Dead Gorgeous" from the bright pink cs with my SCAL program and my Expression using the font "freehand".  I hope you like it! Thanks for looking!


Thursday, July 26, 2012

Inspired by Pinterest!

I have to admit it....I am totally addicted to Pinterest! I mean who isn't? Right? Especially us crafty girls........the inspiration for projects on Pinterest is limitless!  I pinned this tutorial awhile back....So when my friend Kelley posted a challenge the other day to find a project on Pinterest and make it your own.....well I decided to give it a try.

 I grabbed an old play shirt of my grandaughter's (just in case I ruined it) and I cut the shirt following the instructions below. I will say that it is important to use a very sharp pair if scissors! The rest of the instructions to complete this project can be found by clicking on the tutorial above.


Now I may be crafty but sewing is definately NOT my forte......but the sewing machine was cooperating and I managed to complete this little project in about 15 minutes! It was super easy! And my grandaughter, Gracie just loves her NEW Ariel tank top! Isn't she a cutie? 


Thursday, July 19, 2012

G-45 Old Curiosity Shoppe altered frame

Today I wanted to share with you the altered wooden frame I made for the "all handmade swap" I participated in with Kelley Rooks. This is one of those unfinished wooden frames you can pick up at Michael's craft store. I started out by sanding and smoothing all the rough edges, and then painted the entire frame with black acrylic paint. I chose the diamond patterned paper from the G-45 Old Curiosity stack to cover this frame so It would match Kelley's scrap room. Normally I adhere the paper to the frame with decoupage and then after I sand the edges and make sure everything is smooth I would then coat over the paper and the entire frame with decoupage. But this time I decided I liked the matte texture of the paper and did not want to add a coat of decoupage over it.....so I glued the paper down with my decoupage being very careful as to not get any of the glue on the outside of the paper. I then sanded all the edges to make them smooth. Next I took the "newsprint" patterned paper and cut it into a 1 1/2 inch strip and glued across the middle and added buttons. I handmade the Flower with my Spellbinders "rose creations" die and added gold stickles to the edges. I hot glued feathers to the back of the rose and then used the hot glue gun to attach the flower to the frame. I then added a stick pin by just pushing it into the hot glue under the flower after the glue had dried. To finish off the frame I cut a piece of chipboard to fit in the opening of the frame and glued the paper with the apothecary bottles to it. I also cut a piece of clear Acetate to fit inside the opening. This way Kelley can remove the chipboard and slide a photo of her choice inside the frame if she likes between the Acetate and the chipboard backing. This is a very easy project to make......I hope this inspires you to alter a frame of your own. And as always......Thanks for looking!

Friday, July 13, 2012

Old Curiosity Shoppe Altered items

Today I wanted to share some altered items I made for the "All Handmade round 7" swap I joined over on the CMB. The Hostess, and my partner was Kelley Rooks. The rules were that you had to make 5 handmade or altered items. Kelley loves the G-45 Old Curiosity Shoppe collection and had recently altered some items for her scraproom...........so I wanted to make a few things to match that she could use. I made her an altered clipboard, wooden frame, pencil cup, canvas, a tiny hanger which is a photo holder and a name plate. I have already posted the info on the canvas.....so over the next week I will post each of the other items individually with the info on the supplies I used etc. Thanks for looking!

Monday, July 9, 2012

G-45 Old Curiosity Shoppe Altered mini Canvas & easel


My friend Kelley Rooks from the CMB was kind of enough to RAK me a brand new 12x12 stack of the NEW G-45 Old Curiosity Shoppe and the rubber stamp set to match it! Woohoo! Thank You so much Kelley! I love this collection! Anyway, I am also in her "all handmade swap" on the CMB and we are partners. So I decided to make this little altered canvas for Kelley as a "Thank You" and send it along with her other swap items when I mail them out this week!

Now Kelley is all about recycling, renewing, and using up leftovers and things from our stash so that's exactly what I decided to do with this little canvas. I grabbed my baggie of leftovers pieces of cardstock from the G-45 Old Curiosity shoppe and my decoupage and started gluing. Once I had the canvas covered with paper I coated the whole thing with decoupage and when it dried I randomly stamped some images on the paper and inked all the edges of the canvas. The chipboard tag is one that goes with the collection so I added a button and adhered it to the top with glue dots. The chipboard numbers were leftovers from a pkg of Colorbok numbers I had lying in a drawer and they were a bright Lime color.......so I altered the numbers and inked them up a bit with my Tim Holtz "peeled paint" Distress Ink and adhered them to the canvas with my glossy accents! Placed the little canvas on the mini Easel.....and Whala! Done in 15 minutes! I love the way it turned out......I hope Kelley likes it! Thanks for looking!

Friday, June 15, 2012

Copics vs Spectrum Noir

Today I want to talk about Alcohol ink markers. I have been collecting Copic markers for a few months now and Love the professional results achieved with these markers. Blending and shading is a breeze and with over 300 colors to choose from who wouldn't love these markers. But the price point is a little steep and I have found at $6 each for these markers that I am not able to purchase them as often as I would like. Lets face it......you get what you pay for though! And the Copics are definately worth every penny of the cost.
Then along comes Spectrum Noir markers. I walked into my local AcMoore the other day and discovered these markers for the first time. Six markers in a pkg for $14.99 less my 50% off coupon equals $7.50. WOW! Thats $1.25 per marker. How bad can they be? right? so I purchased two pkgs of the Spectrum Noir markers. I bought a set of the purples and a set of the pinks.

Now for my comparison. I colored in an image completely with Copics and one image completely with the Spectrum Noir.........and then I colored an image using both.
We all know the specs on these markers so there is no need for me to get into all that when all that really matters is performance. right?

The biggest difference between the two markers is the tips. The Copics have a chisel tip and a brush tip.....and the Noir markers have a chisel tip and a Bullet tip.

What I found is that although the Copics do glide across the paper a little easier.......the Noir markers seemed to work just fine.

I have problems getting into tiny areas with the brush tip of the Copics and tend to color outside the lines occasionally.....whereas it was much easier to get into the tiny spaces with the bullet tip on the Noir marker.

The Noir markers seem to be a little wetter and absorb more into the paper though so they are prone to bleeding more than the copics.

It seems to be much easier to Shade with the copics......I did find that the lighter colors of the Noir markers tend to wash out the darker shades......so when blending and shading you have to go over the image a few more times to get the same results you would achieve with the Copics in less time.

As we all know the Copics are available in 358 colors and the Noir are only available at this time in 168 colors, so BIG difference there.

I did find that on my third image where I used a combo of Copics and Noir markers to color my image that the two different brands of markers worked very well together.

So the bottom line for me is that there are pro's and cons to both. I myself do like the copics much better than the Noir markers.......but the fact is that they are both alcohol ink markers and the Noir are so much cheaper to buy  that I believe I will continue buying them and adding their colors into my copic collection since they do seem to work quite well together. So for a beginner like myself on a budget my opinion is that the copics are a much better marker and worth every penny but i see no reason not to enhance your Copic collection with the Noir markers. Besides that fine point bullet tip on the Noir markers does come in handy when coloring in tight little spaces.

I hope you have enjoyed reading my comparison and personal opinion on the differences between these two brands of markers and that maybe this info will help someone else in deciding whether or not it is worth the money to purchase the Noir markers or not. I would love to hear your opinions or any info you have found between the two. Please feel free to comment below. Thanks!


Theresa

Thursday, May 17, 2012

Chunky Charm Bracelet

I have another handmade item today that I made for CoyoteKim to go along with the "Whats in your vintage purse" swap. As you all know by now the theme for this swap was "Paris", and we were to not only alter a purse and fill it with goodies but also make some handmade items. I figured by now that Kim had enough Chunky charms in her collection from all the charm swaps she has participated in.......so I decided to make her a charm bracelet instead. I bought the chain and the toggle closure at Michael's......and then was able to find all these cute "Paris" charms at M's and Hobby Lobby! The charms include a tiny carriage, Umbrella, a heart charm with a cameo, an Eiffel tower, a fan, a ladies boot and a suitcase. This charm bracelet was actually easier to put together and quicker than making the chunky charms we all love! some of you may recognize the design on the background card......I inked it and de-bossed it with my letterpress printing plates, and then wired the charm bracelet to the card. Thanks for looking!

Thursday, May 10, 2012

Altered mini Canvas & Easel


Today I wanted share another one of the altered items I made for CoyoteKim for the "whats in your vintage purse" swap. This is a mini canvas and easel I altered with the My Minds Eye Lost & Found 6x6 paper stack. I believe this collection is called Madison Avenue.  I'm not a big "pink" lover but I really like this paper stack with all the vintage dress forms, newsprint etc. and thought it would be perfect for this little canvas. I started off by painting the canvas with Pink Acrylic paint. Then I took one of the newsprint pages from the stack, cut it slightly smaller than the canvas and inked it with pink & brown ink with my blending tool. Next I tattered the edges with my Tim Holtz paper distress tool, and then inked the edges brown. I also cut another piece of paper from the stack with the dress form and sewing machine image (I think I cut this at approx 2x3 inches) and once again used my blending tool to add a little bit of pink and brown ink, tattered the edges etc. The flowers are from my stash and are Recollections and then I added the vintage sewing needle tag, a few stick pins and a sewing needle and a button to finish it off. Super simple project and these little canvas's are sooooo addicting! Can't wait to make another one.  Thanks for looking!

Monday, May 7, 2012

Part II of the "Parisian Purse Swap"


As Promised here are the details of the inside of the Parisian Purse I made for CoyoteKim in the "Whats in Your Vintage Purse Swap".................this purse was a little on the small side so as you can see I literally stuffed it with all kinds of goodies. I covered the inside of the box with more paper from the DCWV Mariposa stack and created a little pocket on the inside of the lid. All the goodies you see are just tossed in there loose. I sent Kim a bag of the Tim Hotz wire hanger clips, a crystal letter "K" for her to use on a project. A bag of tiny doilies and then a couple larger doilies (that are in the bottom of the box under all the other goodies) the Large white Flower and butterfly are recollections. I also sent her a metal Fleur De Lis, a bag of Paris buttons with cameos, a wooden "eyeglasses" stamp..............and the rest are handmade goodies like the small altered wooden hanger, Key chain and Picture holder clip.


I love this little wooden hanger, Isn't it cute? Why the heck you would have one in your "vintage purse" is beyond me, LOL! But I altered it and added it anyway! Actually Kim had sent me a Large wooden hanger she had altered for me in another swap, so when I found these little ones I decided to make a "smaller version" for her.  I covered the hanger with My Minds Eye paper and then sanded and inked the edges, Added the black double bow and then hot glued a Cameo button to the center of the bow. On the back of the hanger I attached a small wooden clothespin so the hanger can serve as a photo holder........the size of this hanger is perfect for a 4x6 photograph. 
The next photo clip is one I found at Michael's in the dollar bins, this was the one with the clear acrylic block that had a bright green flower image stamped on two sides. I simply took a paper towel and some Acetone and gently removed the image so the acrylic block would be clear, this worked really well and left no trace behind on the block. Then I wrapped the block in black tulle, tied it with a black ribbon and hot glued a beautiful black flower to the center of the ribbon.


Last but not least is the key Chain I made for Kim's purse. This a "Mix and Mingle" key pendant you can find in the Jewelry section of the craft store. The top of the key twists off so you can add your own beads and decorate the key anyway you like. These keys are intended for the metal lined beads, but I liked these beads better so with a few twists of my bead reamer I was able to make them fit.
Stop back tomorrow and I will post pics of the other handmade Goodies I sent along with this swap that did not fit "INSIDE" the purse! And as always, Thanks for looking! leave me a comment if you'd like!

Saturday, May 5, 2012

Parisian Purse Swap


Today I have the first of several projects I made for Kim, aka CoyoteKim for a "Whats in your vintage purse swap" And the theme for this one was "Paris". I started out with an unfinished wooden purse I purchased at  Michael's.....and then I painted it with an antique Gold Acrylic paint, after the gold paint dried I applied a coat of black satin Acrylic......and then I sanded it so the Gold would show through. I had such a hard time finding Paris themed paper and embellishments at my Local Scrapbook stores.......so I ended up using this yummy black paper with the tiny gold fleur de lis from the DCWV Mariposa stack. After I adhered the paper to the purse..........I liked the matte look of the paper with the shiny gold fleur de lis....so I chose to NOT mod podge over the paper on this one. The beautiful background label is also from the same stack......I fussy cut it out and applied it to the front of the purse with Fabri-Tac glue. The flowers are from Recollections and the Eiffel Tower is Jolee's. I made the black butterflies with an EK Success 3D punch. I punched all three layers of the butterfly and then adhered them together in the middle only....and then added antique gold stickles to the body of the butterfly. Then I added a little bling and a butterfly stick pin. (Lots of butterflies on this one.....not sure if butterflies are a  "Paris" thing though. LOL but I think they look pretty with the Eiffel tower.)Below I have pics of the top and back of the purse. I will post pics of the inside and the goodies I made to go along with it over the next few days! Thanks for Looking!


Wednesday, April 25, 2012

My Monkey!


Here is another page I finally finished. This one is a Layout I made for my Grandson Caleb's album! Caleb is  Autistic and doesn't talk a Lot.....but he sure knows how to have fun....and is just the sweetest little guy! On this day we took Caleb and his little sister Lily to the local Gymn to monkey around and have some fun! Caleb just loved jump.....jump....jumping....and jumping some more on the trampoline! Isn't he a Cutie?

For this layout I used the Recollections Monkeying Around paper from Michael's. I then went to the
 My Scrap Chick website and purchased the Bee Bears svg file......downloaded it....and then altered the pattern for the bees to make them into Monkeys to match the monkeys on the paper. Below is a close-up pic of the bees and then my monkeys. This was a really fun page to create! Hope you like it! 


She is my Sunshine!


I have been trying to work backwards and catch up on scrapbooking some of the pics I missed in the little one's books lately. This layout is of my Grandaughter Haylee Grace (we call her Gracie)....Is she not just the cutest little munchkin? Love my baby girl!
Anyway, Her Mommy and I have been singing the "You are my Sunshine" song to her since the day she was born.....so no surprise that it's one of her favorite songs to sing to us too! Well, while visiting me one weekend she picked me these Gorgeous wildflowers (weeds...ha ha) out of the yard.....and when she brought them in to me..... she started singing her version of the sunshine song....It goes like this:
No more Sunshine, No more Sunshine, You make me hapeeeeeee, when skies are Grape!
LOL! Love her version.....it is too stinkin cute! She always makes me smile!
She is my Sunshine! 


The paper piecing of the little girl is an svg file I purchased from Treasure Box Designs, she is one of the
Treasure Tots files called Teapot Tammy.......The Sunshine I designed myself with basic shapes in my SCAL program, and I believe the paper is just some leftover paper I have had lying around that originally was from an Easter Stack (sorry.....wish I knew the name brand, but I have had this paper for years!)
Thanks for looking and following my blog! Please leave a comment if you like.....I love to hear from all of you and appreciate the constructive criticism! 

Tuesday, April 24, 2012

Lily & Hippo


This is a picture of my beautiful Grandaughter Lily and her best bud; Hippo!
Lily is 3 years old and has had this little hippo since she was a baby! Well to me....she is still a baby, but you know what I mean! Anyway, Lily is very attached to her Hippo.....she eats and sleeps with him and carries him everywhere. Hippo even rides the School bus and goes to school each day with Lily!
So I thought it was about time to document their unique little friendship!
The paper is from BasicGrey and is called Ambrosia Marmalade. I chose this paper because of the bright Orange colors and Grey......Love the way they compliment each other! And the Hippo is an svg file I got from the Little Scraps Of Heaven website (Thank You Tricia!)  I wanted to keep the layout simple so I just added a few Recollections flowers and a bit of bling!` Hope you like it! Thanks for looking!

Friday, February 17, 2012

Doily Bird Nest

Hi Everyone! I wanted to share this cute little project I made with you today! I was in a Valentine swap with CoyoteKim and part of the swap was that we were to use the Theme of birds and nests in our handmade goodies for each other So.........I found this tutorial on how to make a bird nest from a small doily and decided to give it a try, although I did alter the instructions a bit. This is the final product.....Isn't it cute?


I started with a small white doily.


Then I steeped a tea bag in a cup of boiling water to make my tea dye. Submerged the doily in the dye and left it for approx 1 hour. Then rinsed in cold water to set. Laundered and dried.


Next I gathered up my supplies: Stiffy fabric stiffener, two glass bowls, a metal bowl  and wax paper.


Following the instructions on the bottle of "Stiffy".....I placed the doily into the metal bowl and then slowly added the fabric stiffener......you want to work the stiffener into the doily until it is good and saturated. Gently squeeze out the excess liquid.


I then formed the doilies over the glass bowls and placed them onto a wax paper covered pan. Let them dry for at least 24 hours before removing them from the bowls

The following day after they were good and dry I hot glued shredded paper into the center of the doily
to form the bird nest.(You could crimp & shred book pages, Kraft paper or anything you like for this step) Added a few feathers and three handmade eggs.


For the eggs I simply formed an egg shape with aluminum foil........covered with Fimo clay and baked.
When they were cooled I splattered the eggs with brown acrylic paint! This little project was very easy and turned out super cute! Give it a try!

Sunday, February 5, 2012

Altered Tin

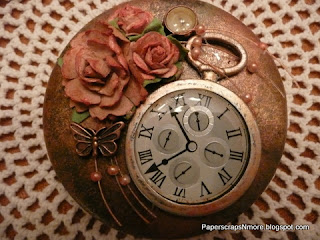
Today I worked on this Altered tin......I started off with a shiny silver tin that I applied a coat of primer to. Then I started dabbing it with the Ranger Adirondack metallic Copper & Gold dabbers. I loved the look and texture I was acheiving but I wanted this tin to be more aged so I also applied Black & sage green matte acrylic paint until I was happy with the results. When the Acrylic paint was dry I lightly dry misted the entire tin with clear satin  Polycrylic by Minwax! Next it was time to Embellish........as you can see I basically used a few Recollections flowers, a pearl spray, an embellished copper paper clip, copper butterfly and a 3d pocket watch I had in my stash. After I adhered everything to the front of the tin I used the Adirondack copper dabber again on the flowers & pocketwatch. I love the way it turned out! I know the pic does not show it well.....but in person it looks like an old and rusty copper tin with a little bit of green patina and age. Inside is also painted the same as the outside and I added a black circle of foam that I glued to the inside bottom of the tin to finish it off! I had so much fun making this tin and getting all messy.......Give it a try and you will be surprised at how awesome the results are! Thanks for looking!

Friday, February 3, 2012

Altered Book swap from CoyoteKim

I just received the most amazing box of goodies in today's mail from my swap partner / partner in crime......CoyoteKim! Some of you who follow her blog may have seen her posts on a few of these items as did I....but I had no idea she had made all these amazing goodies for me! Kim and I have been swapping with each other for quite awhile now and we both like to find new ideas & swaps that challenge us to try new techniques etc. So the premise of this swap was to alter a book for your partner......create a few handmade gifts centered around Birds & nests, something with our initial or name, something altered and something chocolate. We were to also make a charm of some kind in an altered tin. Finally we were to purchase $25.00 worth of gifts from our wishlist. So here is what Kim sent to me.

First of all she sent me this absolutely Gorgeous dress form for my scraproom......LOVE it!

 This altered book.......This is so gorgeous in person! Kim actually took an old book and altered it by gluing the interior pages together and then cutting the center of the pages out with an exacto knife, turning this book into a box! (sorry I don't have a good pic of the inside as my camera battery died!) But trust me when I say she did an absolutely amazing job on this book! The exterior is just beautifully altered.....she used Tim Holtz tissue tape on the binding .....black crackle on the rest of the book and then decorated it with lace, flowers, beads,vintage buttons, TH hardware and this beautiful pocket watch! I was literally speechless when I opened this up and started looking at it!  And I really thought this was an actual feather on the front of the book........until I looked closer and realized she made the feather from craft cardstock! WOW! LOVE the pen nib on the bottom of the feather! Thank you Kim so much.....I will absolutely treasure this!


 The next thing I opened was this adorable box of chocolates.....handmade of course! Kim has all the info on this box here. This is so pretty in person......and she added little chocolates to the inside of all the little boxes for me! YUM!


 Next up was my altered Altoid tin and inside she had this beautiful altered key! Once again, If you would like all the details on how Kim altered this tin and what products she used you can find it here. I Love the way she used one of the Tim Holtz keyholes, Metal corner and a fastener hitch to create the little birdcage! How cute is that? And the texture on this is amazing.....it really looks in person like and old vintage tin. And then to top it off she used more of the fastener hitches to create little feet on the tin! So cute! And the Key is gorgeous too......she inked and aged the key to make it look old and then embellished it with paper, beads, a cherish tag and a pen nib! I ♥ it!!


 My next item was an altered metal tag with my initial on it! As you can see Kim stamped and embossed the back of the tag giving all this great texture.....and then she decorated the front of the tag with a cream colored button, a little shrinky dink dress form, a tiny spool, pearls & lace! Gorgeous!


Love this little beehive tag! For those of you that know Kim she is on the design team over at the Exploring Cricut blog......and this was one of her DT projects which I loved! check it out here
Next up is this beautiful altered heart. I'm not quite sure how Kim made this but it looks as though she started out with a paper mache heart, embossed aluminum foil with a TH embossing folder and then inked it with alcohol inks...then applied the foil to the heart! This is really gorgeous in person! And of course she then embellished the hell out of it with lace, buttons, pearls, gears ribbon & a key! LOVE, LOVE, LOVE!

And now we come to one of my favorites.....this handmade little birdie! Is this not the cutest thing ever? I am assuming Kim used a pattern and cut the base of the bird out of felt, stuffed and sewed him. Then she  made the wings and crown from cardstock, and then added some bling and dangles! When I opened this up I knew immediately this little birdie was going in my new Birdhouse I just purchased for my scraproom!

 Here he is in his new home! Gorgeous! Now I can finish altering and decorating my birdcage!


Last but not least are my final goodies Kim sent me from my wishlist.........a three pack of TH dabbers in Gold, Silver & Copper, which I can not wait to play with! An awesome vintage stamp. A Pkg of TH Facets and a Pkg of two ring binders! As you can see Kim spoiled me big time on this one!

I love everything I received in this swap! Thank you so much Kim! Your talent never ceases to Amaze me! I wish I could come up with more adjectives to use.........I feel like I am constantly saying "Amazing, Beautiful & Gorgeous!" But everything you send me is just that.....Amazing, beautiful & Gorgeous!
Thanks for being such a great swap partner and friend!